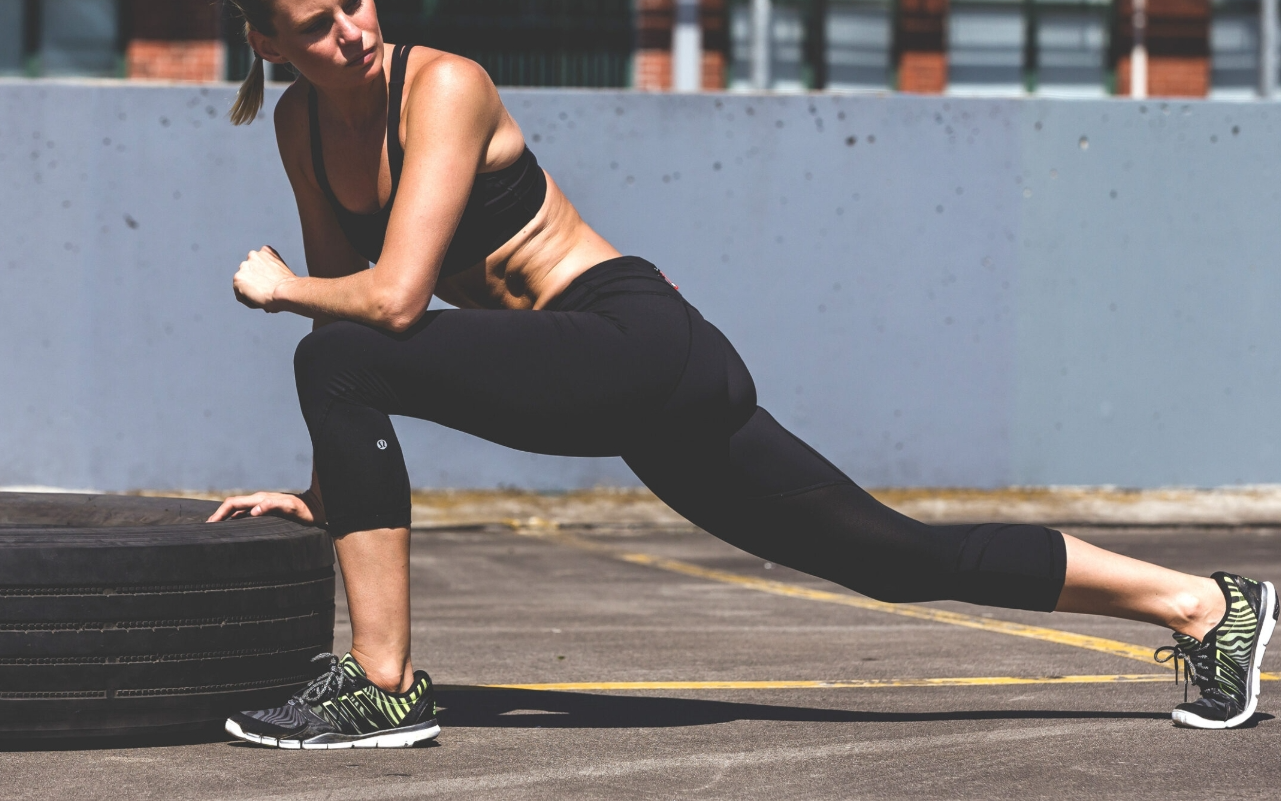
Every activewear brand hits the same wall: a return rate that bleeds the business dry. The leggings roll down. The sports bra gaps. The compression top restricts movement in all the wrong places. Customers don't write detailed complaints — they just click "return," and your margin disappears with them.
Here's the truth most brands miss: the problem isn't your sizing chart, your customer service, or even your fabric choice. It's locked inside the pattern itself.
Whether you're developing a custom activewear collection or scaling an existing product line, this guide breaks down stretch fabric pattern drafting and negative ease calculation at the technical level. It maps the most common fit failure points in leggings, sports bras, and compression tops to the pattern corrections that fix them. You get real numbers, a production-ready fit testing checklist, and a clear path to cutting return rates — from the industry's painful 30%+ down below 15%.
Decoding Activewear Fit Problems Through Return Data Mapping

Return data is a goldmine. Most brands never mine it.
Every "doesn't fit" return carries a precise technical signal — a specific pattern variable that failed under real movement conditions.
Experienced activewear suppliers often find that recurring fit complaints can be traced back to the same pattern-making errors across multiple product launches.
Most brands treat returns as a customer service issue. Pattern makers treat them as a manufacturing issue. Nobody reads them for what they are: a body mapping activewear failure with a clear CAD fix.
Let's look at the financial reality first. The numbers make the urgency hard to ignore.
Say you're shipping 1,000 units per month at $60 retail. A 30% return rate is normal for online activewear. At that rate, your effective gross margin drops to $4.80 per unit shipped . That's not a typo. Return logistics cost $8/unit. Add COGS recovery and salvage discounting, and your $60,000 gross revenue month shrinks to ~$4,800 in real margin. Now cut that return rate to 20% through pattern correction alone. The same model produces $11–13 margin per unit . That's a 2–3× profitability jump from one fix.
70% of activewear returns are fit-driven. The pattern is where you fix the problem — not the returns portal.
The Return Keyword → Pattern Variable Framework
Build a keyword-to-CAD-variable matrix inside your returns dashboard. Stop treating customer complaints as sentiment data. Start reading them as diagnostic input.
Here's how each common complaint maps to a pattern variable:
Customer Return Language | Root Pattern Cause | CAD Variable to Audit |
|---|---|---|
"Falls down," "have to pull up all the time" | Rise too short, back curve too shallow, waist negative ease insufficient | Front/back rise length, back curve radius, crotch pitch |
"Digs in," "too tight in waist," "muffin top" | Waist circumference too small, excessive negative ease, waistband height short | Waist circumference, waistband height, elastic length curve |
"Camel toe," "cutting in at crotch," "rubbing" | Front rise short, crotch extension narrow, gusset undersized | Front rise, crotch extension (front/back), gusset length and width |
"No support," "chest bouncing," "band rides up" | Band too loose, strap too long, cup height low, low-modulus shell fabric | Underbust circumference, band negative ease %, strap length grade, cup height |
"Can't lift arms," "tight across shoulders" | Shallow armhole, high sleeve cap, narrow across-back | Armhole depth, sleeve cap height/pitch, across-back width, bicep grade |
"Goes sheer when I squat" | Fabric over-stretched beyond 80% capacity, low GSM, seat rise insufficient | Negative ease at hip/seat, GSM (target 220–260g), back rise curve depth |
Each row is a return rate reduction opportunity. Each one has a specific numeric correction tied to it. The sections below break all of these down in full detail.
The goal of this mapping layer is straightforward: stop diagnosing fit problems after the customer has already left. Catch them before the first prototype ships.
Negative Ease Calculation and Four-Way Stretch Pattern Drafting
Negative ease isn't a design preference. It's a structural engineering decision with real, measurable consequences.
Get it wrong by 5%, and the leggings roll down mid-workout. Get it wrong by 10%, and the compression top kills shoulder mobility.
For brands producing through an OEM activewear model, documenting negative-ease standards is critical for maintaining consistent fit across production batches and manufacturing locations.
The difference between a great fit and a high-return SKU often comes down to one formula — applied differently across garment zones.
The core calculation is this:
Pattern Dimension = Body Static Measurement × (1 − Ease %)
That formula is only half the picture, though. You also need to account for fabric recovery strength . A high-recovery fabric with strong elastic return can handle a deeper reduction. A lower-recovery knit stretched to the same percentage will distort, sag, and fail at the seam. That's what causes the "goes sheer when I squat" complaint.
Matching Stretch Class to Reduction Percentage
Not all stretch fabrics pull the same. Here's the working reference by stretch class:
Stretch Class | Stretch Range | Pattern Reduction |
|---|---|---|
Stable knit | 18–25% | ~2% |
Moderate knit | 26–50% | ~3% |
Stretch knit | 51–75% | ~5% |
Very stretchy knit | 76–100% | ~10% |
Try this fast field test: cut a strip, set pins 4 inches apart, stretch to a comfortable tension (not maximum), and measure the extension. Every 0.5 inch over the 4-inch base equals 10% stretch. That one number tells you which row of the table you're drafting from.
Zone-Based Reduction: Where Most Patterns Break Down
Four-way stretch moves in both directions — length and width. A single global reduction percentage is a shortcut. It creates new fit problems instead of solving them. Draft each zone on its own, based on load-bearing function:
Chest / shell zones: 8–15% reduction
Band / elastane zones: 15–25% reduction
Hips / thighs: 5–12% reduction
Articulation zones (knees, elbows): approach zero ease
Low-stress zones are where most pattern makers over-correct. Adding compression-level reduction to a knee panel doesn't build support. It creates drag lines and pushes the seam downward under movement. Keep reduction minimal in areas that don't carry load.
Before you lock in any zoned reduction, test the draft in a simple sleeveless shell first. Confirm the stretch-block behavior before adding construction complexity on top. That one step catches most directional ease errors before they reach prototype stage.
Body Mapping Activewear and Motion Analysis Garment Design

Static measurements build garments for bodies standing still. Your customers are squatting, lunging, and pressing overhead — that's where most activewear patterns break down.
Body mapping activewear isn't a trend term. It's an engineering approach that treats the human body as a multi-zone pressure system. Many performance apparel brands working with ODM activewear partners now integrate motion-analysis data directly into the pattern development process.
Each zone carries different load demands based on the movement. Pattern makers who get this stop drafting one-piece reduction rules. They start drafting zone-specific stretch budgets instead.
The Seven High-Strain Zones You Must Design Around
Motion analysis research points to the same anatomical hotspots again and again. These are the spots where fabric strain spikes during athletic movement. Miss them in your pattern, and customers feel every one of them.
Shoulder / scapula / underarm: Shape shifts a lot between a neutral arm position and an overhead reach. Your pattern needs to work across both extremes — not just one.
Axilla (underarm seam): Direct seams here create friction and cutting during arm swing. Rotate the armhole seam forward or add a gusset. Keep bulky seams out of this zone.
Inseam / crotch curve: Deep squats and lunges expose every millimeter of error in your crotch geometry. Small pattern mistakes here lead to outsized pressure complaints in seated and squat positions.
Knee / popliteal fossa: The back of the knee is a high-pressure buildup point. Fabric piles here under flexion unless you adjust the rest-shape for a bent-knee pose.
Elbow flexion: Same logic as the knee. Cut negative ease at the inner elbow. This is a comfort zone, not a compression zone.
Lower lumbar: Forward-bend postures expose rise length errors fast. Short back rise pulls the waistband away. Poor lumbar shaping creates diagonal strain lines — and those lines point straight to your returns inbox.
Lateral torso: Side panels are your main tool for controlling stretch. They manage the shift between extension and flexion. Get the length wrong, and the whole garment moves out of place during activity.
Translating Zone Maps Into Pattern Decisions
Each zone needs a specific design fix — not just a different ease percentage.
Seam routing is your first lever. Cut or move inner-thigh seams and direct axilla seams wherever you can. Route them along muscle lines, not across them. Curved seams that follow body contours improve compression direction and reduce distortion as muscles engage.
Seam construction is your second lever. Flatlock is the go-to for high-movement seams — low profile, strong under stretch, and comfortable against skin during repeated motion. Bonded seams cut bulk further but don't stretch as much. Save those for lower-strain edges like necklines.
Gusseting is your third lever. Underarm and crotch gussets spread stress away from single seam intersections. They create multi-directional ease at the body's main pivot points. No crotch gusset in your current leggings pattern? That's the first variable to check against your return data.
The Multi-Pose Stretch Budget Framework
Traditional activewear size grading relies on fixed ease values. Motion analysis garment design swaps that out for a stretch budget — a defined strain range per zone, tested across multiple movement poses at once.
A solid pose set for most activewear categories looks like this:
Movement Pose | Primary Zones Under Load |
|---|---|
Deep squat | Hip, crotch, knee, lumbar |
Lunge | Inseam, lateral thigh, popliteal |
Overhead press / pull-up | Shoulder girdle, axilla, upper back |
Running stride | Hip extension, knee flexion, lateral torso |
Forward bend / seated | Lower back, upper seat, lumbar |
For each zone, set your target stretch range before drafting starts:
Support zones (quadriceps, glutes, upper back): 10–25% extension target
Mobility zones (knees, elbows, underarm): 0–5% — keep restriction at zero
Torso / transition zones: 5–10%
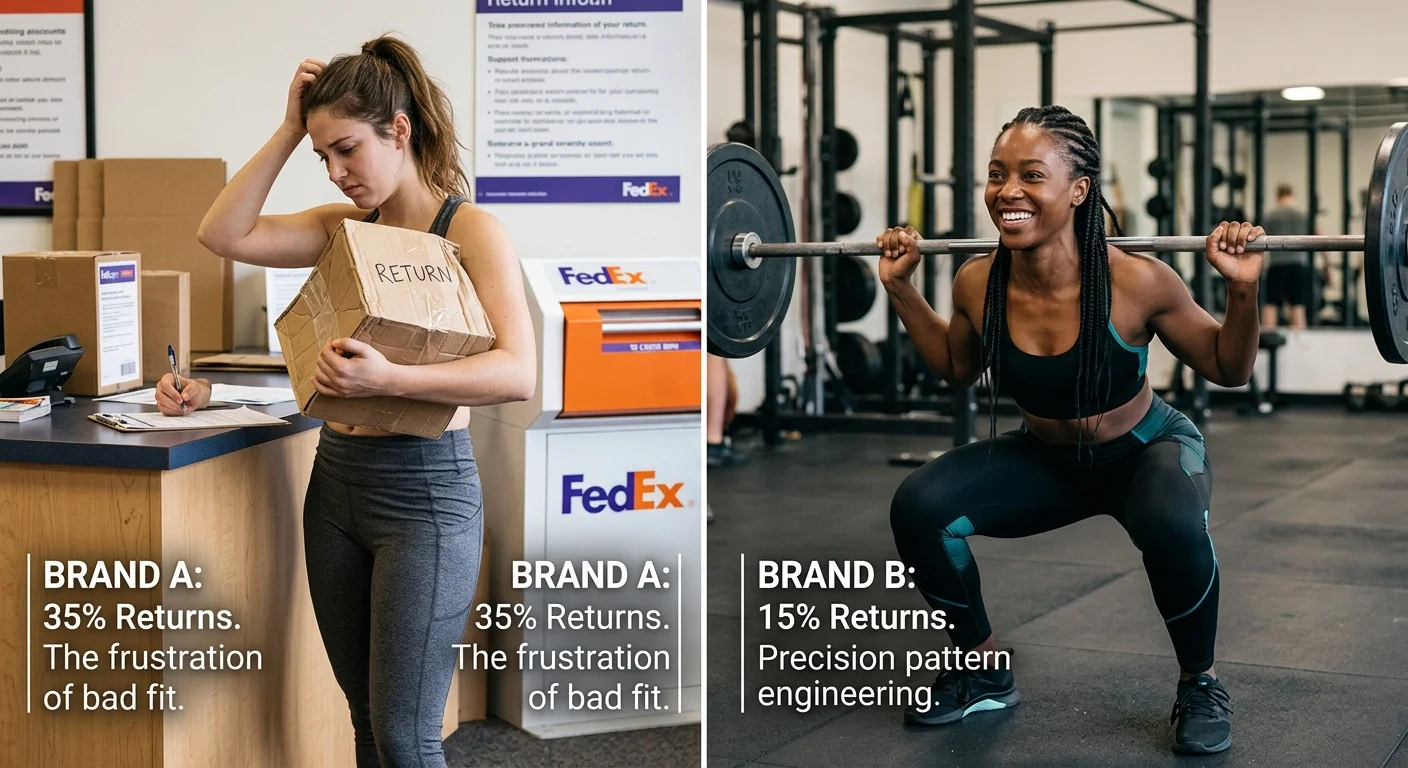
Any zone that keeps going over its target stretch during simulated or prototype movement gets lengthened or re-shaped in the rest pattern — not patched with softer fabric or bigger sizing. That's the gap between brands sitting at 15% return rates and those stuck at 35%.
Category-Specific Pattern Corrections for Leggings, Sports Bra, and Compression Tops
Three categories. Three different failure modes. One shared root cause: patterns drafted without accounting for how athletic bodies move.Leading activewear manufacturers know that small adjustments to rise geometry, waistband tension, and compression zoning can eliminate a significant percentage of fit-related returns before production even begins.
Leggings roll down because the waistband isn't built to stay up. Sports bras gap and bounce because band tension and cup geometry aren't matched to impact level. Compression tops kill shoulder mobility because armhole depth was designed for a static mannequin, not a pull-up. Each problem has a precise numeric fix — and none of them need a full re-draft.
Leggings: Rise Geometry, Waistband Stability, and Inseam Alignment
Rise Curve Refinement
The front-to-back rise split is where most leggings patterns break down without obvious signs. Small errors here produce big complaints — camel toe, seat drag lines, waistband pull-down. They all trace back to millimeter-level decisions in crotch geometry.
Here's the correction range that resolves 80% of these issues:
Front rise scoop : Increase or decrease by 0.3–1.0 cm at CF to eliminate camel toe or front drag lines. Blend to zero at the side seam over 8–12 cm — no abrupt transitions.
Back rise height : Increase 0.7–1.5 cm at CB for full-seat fits. Reduce 0.3–0.8 cm for flat-seat bodies. Blend into the crotch curve over 6–10 cm.
Back crotch extension : Lengthen by 0.8–1.8 cm on high-compression leggings to remove horizontal seat drag lines. At the same time, shorten the front extension by 0.3–0.7 cm to push the inseam toward the back where it belongs.
The core principle: keep total vertical rise constant while trading extension depth against curve radius. The waistband holds its intended level. The crotch seam moves into the right position for the body.
Waistband Anti-Roll Engineering
A waistband that rolls has the wrong structural architecture — not just the wrong elastic. Fix both layers:
Elastic negative ease by compression target:
Medium compression: elastic 8–15% shorter than waist opening
High compression: 15–20% shorter , divided into 4 equal segments distributed around the full circumference
Double-layer construction : Use a self-fabric waistband at 8–12 cm finished height. Cut the inner layer 0.5–1.0 cm shorter than the outer layer. That difference pulls the roll-prone top edge inward — no extra hardware needed.
Vertical stay seams : Add 2–4 narrow vertical tacks at CF, CB, and side seams. Connect both waistband layers. This stops rolling torque before it builds.
Contour shaping : Switch your straight waistband to a contoured cut. Reduce the top edge by 0.5–1.2 cm versus the bottom edge at CF/CB. For high-waist styles, raise CB height an extra 0.5–1.0 cm and reduce the CB top edge a further 0.5–0.8 cm . This directly counters swayback-driven roll-down.
Front stabilization : In plus sizes, interface the upper third of the waistband with light tricot fusible or a stable power mesh panel at CF. This stops the collapse that shows up in photos tagged as "waistband bunching."
Inseam Bias Correction
Twisted legs are a pattern problem, not a construction problem. The inseam is pointing in the wrong direction.
Shift inseam pitch 3–7 mm toward the back at knee level. Blend to zero at both the hem and the crotch point.
Add 0.3–0.5 cm to back inseam length between crotch and knee. Remove the same amount from the front. This rotates the garment backward during wear — that's the right position for the seam.
Check your grainline. If front thigh drag lines angle toward CF, rotate the leg panel 1–2° on the marker to follow actual body stance angle.
For high-stretch knits: keep the inseam curve minimal. Move shaping to the outseam side panel instead. Less inseam curve means less torque on a fabric that wants to move.
Sports Bra: Band Calibration, Cup Architecture, and Strap Load Distribution
Underband Negative Ease by Impact Level
The sports bra band does most of the work — or it should. Industry target: 70–80% of support from the band, 20–30% from straps. A customer who says "band rides up" is telling you that ratio has flipped.
Calibrate band negative ease to impact level, not just size:
Impact Level | Elastic Negative Ease | Band Height (Finished) |
|---|---|---|
Low | 10–15% | 3–4 cm |
Medium | 15–20% | 4–5 cm |
High | 20–25% | 4–6 cm |
The key distinction: use 15–25% negative ease on the elastic but only 5–12% on the fabric band itself . The elastic carries the tension load. Over-compressing the fabric band creates the "digging in" complaint without adding any real support.
Practical benchmark: for a 70 cm underbust circumference, a 2.5 cm reduction equals about 3.5% negative ease. That's enough for low-impact styles only. Running and high-impact sports bras need much deeper elastic reduction — not just tighter fabric.
Cup Depth and Side Panel Architecture
Cup-fit complaints — "gaping at neckline," "side spillage," "breast tissue escaping under arm" — each point to a specific fix:
Gaping at neckline or side seam : Add 0.5–1.0 cm apex length from CF to bust point.
Excess fabric / compression flattening : Remove 0.5–0.8 cm via vertical dart transfer.
Side spillage : Increase the wire line or underbust contour by 0.3–0.6 cm toward the side seam.
Hollow underbust : Reduce that same contour line.
D+ cup sizes need structural reinforcement in the side panel that smaller cup grades don't:
Increase side panel height under the arm by 1.0–2.5 cm compared to the A–B cup base block.
Widen the side panel at the underarm by 0.7–1.5 cm for high-support styles. This cuts vertical cup bounce, but balance it against armhole clearance to prevent chafing.
Grading rule : For each cup letter increase, add 2.0–2.5 cm to the full-bust circumference on the pattern. Split that addition as roughly 40% to cup depth, 40% to side panel width, 20% to center front . Uneven distribution is what causes one-cup-size-up fits that still feel off.
Strap Load Redistribution
Strap complaints fall into two opposite failure modes: straps that dig in and straps that fall off. Both are pattern problems.
Excessive bounce / straps too loose : Shorten by 0.5–1.5 cm .
Shoulder dig-in with high band tension : Lengthen by 0.5–1.0 cm . Also add 0.5–1.0 cm more negative ease to the band elastic to rebalance the support load between band and straps.
Straps falling off narrow, sloping shoulders : Increase shoulder slope on the pattern by 1–2° by raising the neck end 0.3–0.7 cm .
For larger busts with racerback or yoke styles: widen the upper back by 1.0–2.0 cm per side . This shifts load from the shoulder straps into the upper back muscles. For narrow shoulders, bring strap anchor points 0.7–1.2 cm closer together near the neck. For broad shoulders, move them 0.7–1.5 cm apart at the back armhole. These changes fix neck pressure complaints that customers can't describe clearly — they just know the bra feels wrong.
Compression Tops: Back Proportion, Armhole Mobility, and Respiratory Ease
Chest-to-Back Proportion for Athletic Builds
Standard tops are drafted for average torsos. Athletic bodies — especially those with developed lats, traps, and rhomboids — have a back-to-front width ratio that standard blocks can't handle. The result: front compression feels right, but the back pulls and locks down scapular movement.
Here's the correction approach:
Add 2–4 cm total width across the upper back between armholes.
Keep the chest width increase smaller — 1–2 cm — to hold front compression without a sloppy front panel.
Shift the shoulder seam 0.5–1.0 cm toward the front. That one move increases scapular range and reduces front neck pressure at the same time.
For the upper back panel, orient the fabric's greatest stretch direction across the shoulder blades . Use a back yoke or center-back panel with 1–3% additional stretch allowance built into that zone.
Armhole Depth for Overhead Range
"Can't lift my arms" is almost always an armhole depth problem, not a shoulder width problem. The fix is precise:
Drop the armhole at the underarm point by 0.5–1.2 cm while keeping the tight sleeve cap. You preserve compression without losing overhead mobility.
At the front armhole, remove 0.3–0.5 cm at the bust-level curve. This stops gaping when arms raise — a complaint that typically shows up as "top looks weird when I reach overhead."
Increase the back armhole scoop by 0.5–1.0 cm around the lat area for swimmers and rowers. This handles muscle bulk without losing sleeve hold.
For the sleeve-armhole interface: increase biceps circumference in the compression sleeve by 5–10% over relaxed biceps girth for high-compression styles. Split the added sleeve perimeter 60% to the back armhole, 40% to the front .
Respiratory Zone Micro-Positive Ease
Most compression top patterns skip this correction — and it's exactly why customers say the top "makes it hard to breathe during intense cardio."
The diaphragm line sits at the bottom of the ribcage. At that level only, you need a controlled zone of positive ease:
Add 1–3 cm extra circumference at the diaphragm line. Taper back to normal negative ease over 3–6 cm up and down from that point.
Split the front panel into 2–3 vertical segments. Add 0.3–0.5 cm width to each segment at the diaphragm level. Orient the high-stretch fabric to allow expansion at the front and sides. Keep the back panel more compressive to support posture.
For very high-compression fabrics in the 30–40% stretch range: reduce overall chest negative ease to 4–8% while keeping sleeves at 8–15% . Then layer the diaphragm micro-ease on top of that reduced baseline. The result is a top that compresses the torso without restricting the breath — and that's the difference between a product customers reach for every session and one that stays in the drawer.
Activewear Prototype Fitting and Performance Wear Fit Testing Checklist
A pattern correction means nothing if you can't verify it held up before mass production ships. The best-performing brands validate every prototype under real movement conditions before approving bulk production at the activewear factory level.Most brands skip steps in this process — and those skipped steps show up later as return rate statistics. This checklist keeps that from happening.
Run the process in four phases. Each one catches a different class of defect.
Phase 1: Pre-Fit Table Validation (Before Any Try-On)
Measure every prototype against your spec sheet before the garment touches a body . Stretching distorts measurement. Get your numbers clean first.
Point-of-measure (POM) tolerances for base size M:
Measurement Point | Compression Tolerance | Relaxed Tolerance |
|---|---|---|
Chest / bust circumference | ±0.5 cm | ±1.0 cm |
High-support bra underband | ±0.3 cm | — |
Waist circumference (leggings) | ±0.5 cm | ±0.7 cm |
Hip circumference | ±0.7 cm | ±1.0 cm |
Thigh / knee / calf | ±0.5–0.7 cm | ±0.8 cm |
Inseam / outseam | ±0.7–1.0 cm | ±1.5 cm |
Armhole / sleeve opening | ±0.3–0.5 cm | ±0.5 cm |
Neckline circumference | ±0.3–0.5 cm | ±0.5 cm |
Flag every out-of-tolerance POM on a prototype review sheet before the fit session opens. This stops your fitting team from wasting time diagnosing construction issues that are already on record.
Symmetry checks — within ±0.3 cm left-to-right:
- Shoulder length pairs, armhole depth pairs, side seam lengths
- Front and back rise seams, hem heights
- Panel widths at fixed checkpoints (e.g., 5 cm below armhole)
Grain line alignment:
- Side seams must hang perpendicular to the floor. Twisting points to a grain error or panel distortion — not a press issue.
- Waistband logos and stripes should sit level and parallel to the floor.
Construction integrity — visual and manual stress:
- Flatlock seams: stretch to 120–130% of body circumference. Confirm full flatness, zero tunneling, no popped stitches.
- Overlock and coverstitch hems: stretch to 120–130% width for 10 repetitions. Any thread break or seam cracking is an automatic fail.
- Elastic at waistbands, leg openings, and bra underbands: elongate 30–50% for 10 cycles. Check for stitch popping, tunneling, or elastic rolling.
- Check bar-tacks and reinforcement at every high-stress intersection — crotch gusset ends, pocket openings, strap joins.
Phase 2: Dynamic Movement Protocol (Live Fit)
Static validation tells you the garment was built to spec. Dynamic validation tells you whether it actually performs like one.
Upper body movement sequence:
- Overhead arm raise, 10 repetitions — check hem ride-up, neckline choking, armhole bite into underarm, sleeve pull
- Push-up and plank position — check upper back tightness and bust compression behavior
- Cross-body reach and hugging motion — the top must not restrict across the back with arms crossed
Lower body movement sequence:
- Deep squat and lunge sequences — the crotch must not cut into the body or drop too low
- Sit-to-stand cycles, 10 repetitions — check back waist gaping and front waist cutting into the abdomen
- Jog-in-place and short run — track legging slip-down, waistband roll, and inner-thigh chafe points
Drag line mapping: Every drag line or whisker at the bust, crotch, knees, or elbows needs a linked pattern or spec correction before the session closes. Sketch each one on annotated fit photos.
Phase 3: Fabric Stretch, Recovery, and Compression Validation
This phase separates garments that feel right in the fitting room from ones that fall apart after three workouts.
Stretch and recovery benchmarks:
- Mark a 10 cm segment at each high-strain zone — knee, seat, thigh, bust
- Have the model perform 20–50 repetitions of the target movement (squats, overhead raises, running)
- Re-measure: acceptable residual growth is ≤0.5–0.7 cm (≤5–7%) in controlled compression regions
- For compression garments: residual growth target is ≤3–5% per direction after one stretch cycle. General athletic knits: ≤6–8%
Rebound rate proxy test:
- Stretch a marked 10 cm segment by 30% and release
- Measure recovery at 1 second, 30 seconds, and 120 seconds
- Pass threshold: ≥95% recovery at 30 seconds, ≥97–98% at 120 seconds for high-performance compression. General activewear: ≥90–95%
Compression consistency targets by zone:
Zone | Negative Ease Target |
|---|---|
High-support bra underband | −4 to −8% |
Performance leggings waist | −5 to −10% |
Leggings thigh | −2 to −6% |
Leggings calf | −1 to −4% |
Flag uneven compression across the same garment. Tight at the knee but loose at the calf points to a grading or panel shape error — not a fabric issue.
Waistband migration threshold: A waistband that moves more than 2–3 cm during 10–15 minutes of running or HIIT triggers an automatic redesign. Bra straps that leave deep red marks after 20–30 minutes of activity fail by the same rule.
Pilling and friction rating: Run a 500-stroke simulated chafe test on inner-thigh panels, underarm, and under-bust areas. Rate on a 1–5 scale (5 = no pilling). Your pre-production minimum should be ≥4 for all high-friction zones.
Phase 4: Multi-Size Fit Matrix and Pre-Production Sign-Off
Base-size approval is not production approval. Grade your samples and fit each size on a live model whose body measurements match your grade rules. No approximations.
Per size S–XL, collect:
- On-body circumference versus spec at bust, waist, hip, and thigh
- Comfort rating (0–10) across compression, breathability, and ease of movement
- Observed issues — drag lines, gaping, rolling, migration — logged by size and body type
80%+ defect interception standard:
- All core styles need both live fit on each size and 3D virtual simulation against the production pattern (CLO, Browzwear)
- Any strain hotspot confirmed by both live fit and 3D simulation — crotch pressure, shoulder binding, bust compression failure — gets corrected before pre-production sample submission
- Do not move to PP if more than 20% of recorded fit points across the size matrix remain unresolved
Pre-production go/no-go criteria:
Criterion | Pass Threshold |
|---|---|
Stretch recovery (compression zones) | Residual growth ≤5% |
Stretch recovery (general zones) | Residual growth ≤8% |
Compression comfort (wear test) | ≥80% of testers rate ≥7/10 |
Negative ease accuracy | Within ±2% of target spec band |
Critical construction issues | 100% resolved before next stage |
Non-critical fit issues | ≥80% resolved; remainder documented and signed off |
Brands hitting sub-15% return rates aren't guessing at fit. They run this checklist — size by size, movement by movement — before a single production unit ships.
Athletic Wear Pattern Grading and Non-Linear Size Scaling
Size grading breaks activewear patterns in ways that basic apparel grading never does. Most brands don't catch this until returns pile in from XL and 2XL customers.
The core problem is geometric. The human body doesn't scale at the same rate between sizes. Seat and thigh circumference grows faster than waist circumference as sizes increase. Hip-to-waist ratio shifts. Back rise needs more length than front rise. Add a uniform cm increment across every measurement point, and you create a new set of fit failures — spread across your size run in a different pattern.
Why Linear Grading Destroys Compression Consistency
Standard apparel grading adds a fixed girth increment per size — 4–6 cm at the hip, spread around the garment. In compression leggings, that approach kills the negative ease targets you built into your base pattern. It happens gradually, and most brands never notice until customers complain.
Here's what happens in practice:
Waistband and ankle openings get oversized — grip disappears, slippage starts
Seat, hip, and thigh don't get enough room in larger sizes — fabric strain increases, compression drops, seams shift
Effective negative ease shrinks because body circumference grows faster than linear pattern increments can keep up with
Say your XS base is drafted at −12% negative ease at the hip. A straight linear grade pushes that number toward −8% or lower by 2XL. The spec sheet looks fine. On the body, the garment performs like a different product.
The Non-Linear Grade Rules That Hold Compression Across Sizes
The fix is a zone-differentiated grading matrix . You use different increment sizes at different measurement points, with further adjustments for the XL–3XL extended size range.
For a standard XS–3XL leggings run, use these increments per size step:
Zone | XS–L Increment | XL–3XL Increment |
|---|---|---|
Hip / seat circumference | +4.0–5.0 cm | +5.0–6.0 cm |
Upper thigh | +3.0–4.0 cm | +3.5–4.5 cm |
Knee | +1.5–2.5 cm | +2.0–2.5 cm |
Calf | +2.0–3.0 cm | +2.5–3.0 cm |
Ankle opening | +0.5–1.0 cm | Cap — hold constant |
Waistband pattern | ~70% of body waist increase | ~60–65% of body waist increase |
The ankle cap is the rule most brands miss. At 2XL and 3XL, extra girth goes into the calf and knee — not the ankle opening. Let ankle growth run uncapped, and grip fails. The legging silhouette starts to flare at the bottom. Cap it at XL and redistribute that volume upward.
Distribution split within each size step:
- 60–70% of hip and thigh increment → back and side seams
- 30–40% → front panel
That back-weighted distribution matches actual body geometry. Glutes and lateral thighs drive size growth more than the anterior hip does. Front-heavy grading produces front panels that feel baggy while the back seam still pulls. You end up with two fit problems at once.
Maintaining Target Negative Ease With a Per-Zone Matrix
The goal isn't consistent cm increments per size. It's consistent negative ease percentages per zone across every size in the run.
Use this formula at each grade point:
Pattern circumference = Body circumference × (1 − Target negative ease %)
For a women's compression legging targeting −12% at the hip:
XS body hip = 88 cm → Pattern hip ≈ 77.4 cm
M body hip ≈ 96 cm → Pattern hip ≈ 84.5 cm
3XL body hip ≈ 112 cm → Pattern hip ≈ 98.6 cm
The pattern hip increment between sizes is not uniform. It mirrors the body increment scaled by the ease factor. That's how compression stays consistent across the full size run.
Target ease bands by zone — apply at every size, not just base:
Zone | Negative Ease Target |
|---|---|
Waistband | −8 to −10% |
High hip / seat | −12 to −15% |
Thigh | −8 to −12% |
Calf / ankle | −5 to −10% |
Shape Block Adjustments for Different Body Proportions
Grading numbers alone don't solve the problem for brands serving multiple body shapes. Pear, hourglass, and apple silhouettes need separate front-back distribution rules — not just different total circumferences.
Pear / curvy builds:
- Shift 60–70% of the waist-to-hip grade to back and side seams
- Add 0.5–1.0 cm extra back rise length from M upward
- Reduce front waist curvature to prevent gaping at the front panel
- Raise waistband height at CB by 1–2 cm — this counters the sliding force a larger seat creates by pulling the waistband down during movement
Hourglass builds:
- Hold −12 to −15% hip ease, but concentrate shaping at side seams rather than CF/CB
- Use a contoured waistband with a deeper back curve and reduced front length to follow the natural waist dip
Apple / fuller-front builds:
- Move more waist grade to the front panel; reduce the seat increment relative to the base pear block
- Drop negative ease over the abdomen to −6 to −8% — versus −10 to −12% at the hip and seat — so the front waistband doesn't cut in
- A double-layer front panel with internal shaping handles this better than just adding more circumference
Vertical length grading follows the same non-linear logic:
- Front rise: +0.5–0.8 cm per size
- Back rise: +0.8–1.2 cm per size (curvy blocks take the upper end)
- Inseam: +0.5–0.7 cm per size up to L, then hold fixed through 3XL to prevent leg pooling
These aren't optional refinements for premium brands. They're the reason some activewear lines hold a sub-15% return rate across their full size range — while others watch extended-size SKUs spike past 35% and stay there.
Quantifying Impact: How Ergonomic Fit Activewear Reduces Return Rates
The US online apparel return rate sits at 24.4% on average , according to Coresight Research. Fit-sensitive activewear categories tend to run above that number. Every percentage point above it is a direct cut to your margin.
Here's what the numbers look like when ergonomic pattern work makes a difference:
A 25–50% relative reduction from a 24.4% baseline brings returns down to 12.2–18.3%
The lower end of that range drops below the 15% threshold. You can reach it through pattern correction alone — no AI sizing tools or virtual try-on required
Your starting return rate may already sit above 24.4%. That's common in compression-heavy SKUs. The absolute gain from fixing fit is even larger in those cases
The per-SKU math is simple. Take a legging SKU that moves 1,000 units a year. Drop the return rate from 24.4% to 15%. That's 94 fewer returns per SKU per year. At an all-in reverse logistics cost of $8–12 per unit, you recover $750–$1,100 per SKU — before counting markdown losses on returned stock.
MIT Sloan research puts the profit lift from better fit prediction and assortment control at +8.3% . That's the strongest external benchmark available for what systematic fit improvement does to the bottom line.
Pattern optimization is the primary lever here. Browzwear's data backs this up: poor fit drives the majority of returns. Fit accuracy is what reduces them. It's not a downstream fix. It's an upstream engineering decision — built into the pattern block before the first prototype is cut.
Conclusion
Top activewear brands don't guess on fit. They engineer it.
A rolling waistband, a shifting crotch seam, a sports bra that gaps at the cup — each one is a pattern problem. And each has a measurable, fixable solution.
This framework covers it all:
- Negative ease calculation
- Motion-mapped seam placement
- Category-specific grading logic
The industry's 30%+ return rate shows what most brands skip: a solid technical foundation built before the first prototype ships. Not after the chargebacks pile up.
Start with your return data. Let the fit complaints show you where the pattern breaks down. Then work backward:
- Check your correction parameters
- Review your stretch ratios
- Run through the fit testing checklist
Do this until your leggings, sports bras, and compression tops move the way athletes move.
That's more than better stretch fabric pattern drafting . It's the difference between competing on activewear wholesale price alone and building a product line that every fitness wear wholesaler wants to carry because customers keep it instead of returning it.That's a brand with staying power and margins worth protecting.
Fix the pattern. Own the fit. Watch the returns disappear.