Most yoga wear looks the same on the rack — until it falls apart on the mat.
What separates leggings that sell out from leggings that get returned? The manufacturing process. How the fabric is cut, how the seams are sewn, how the print is applied, how the finished garment is inspected — these details decide everything before the product reaches your customer.
Building a yoga wear brand from scratch? Vetting a new yoga wear supplier? Trying to figure out why your current product isn't hitting the mark? These 8 key production techniques give you something most buyers never get:
The ability to ask the right questions
The skill to read between the lines of a factory quote
The confidence to make decisions based on craft, not guesswork
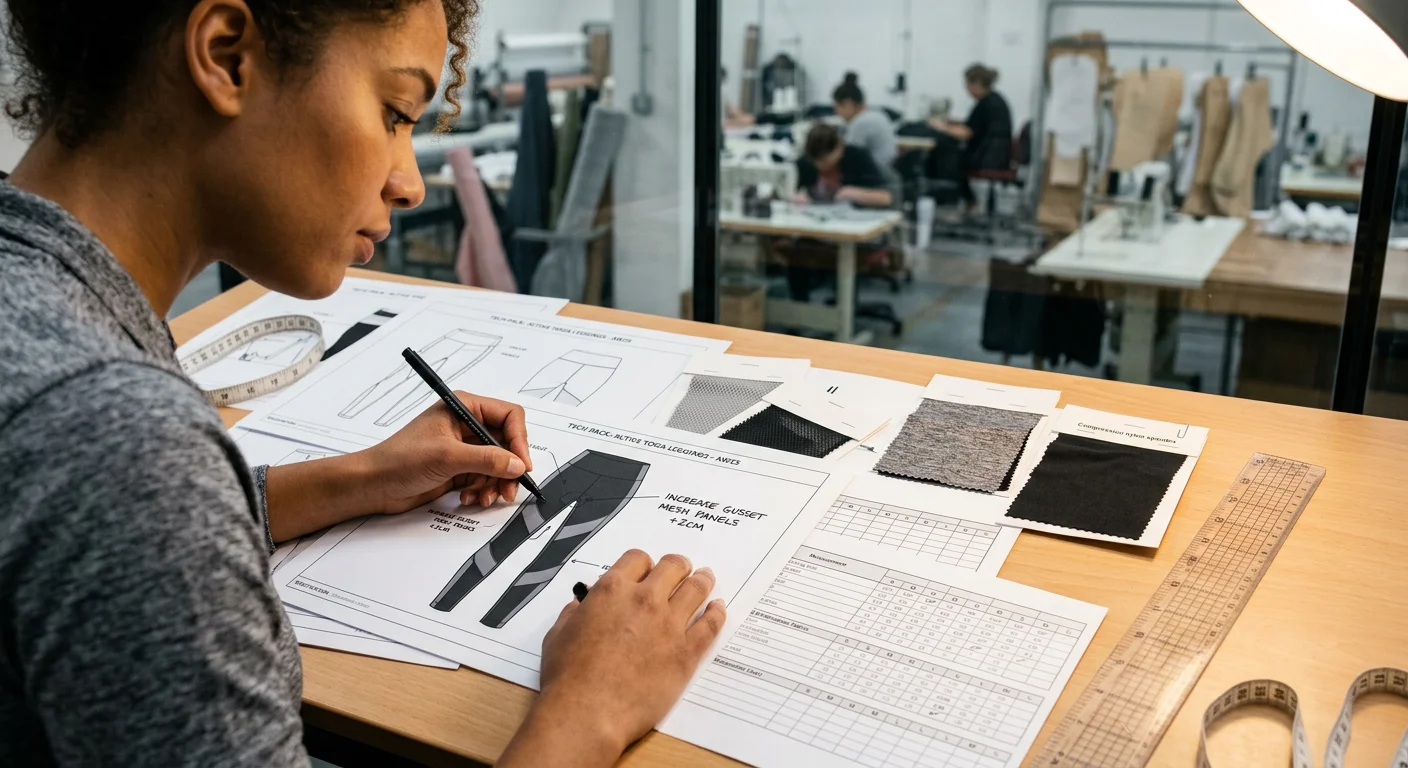
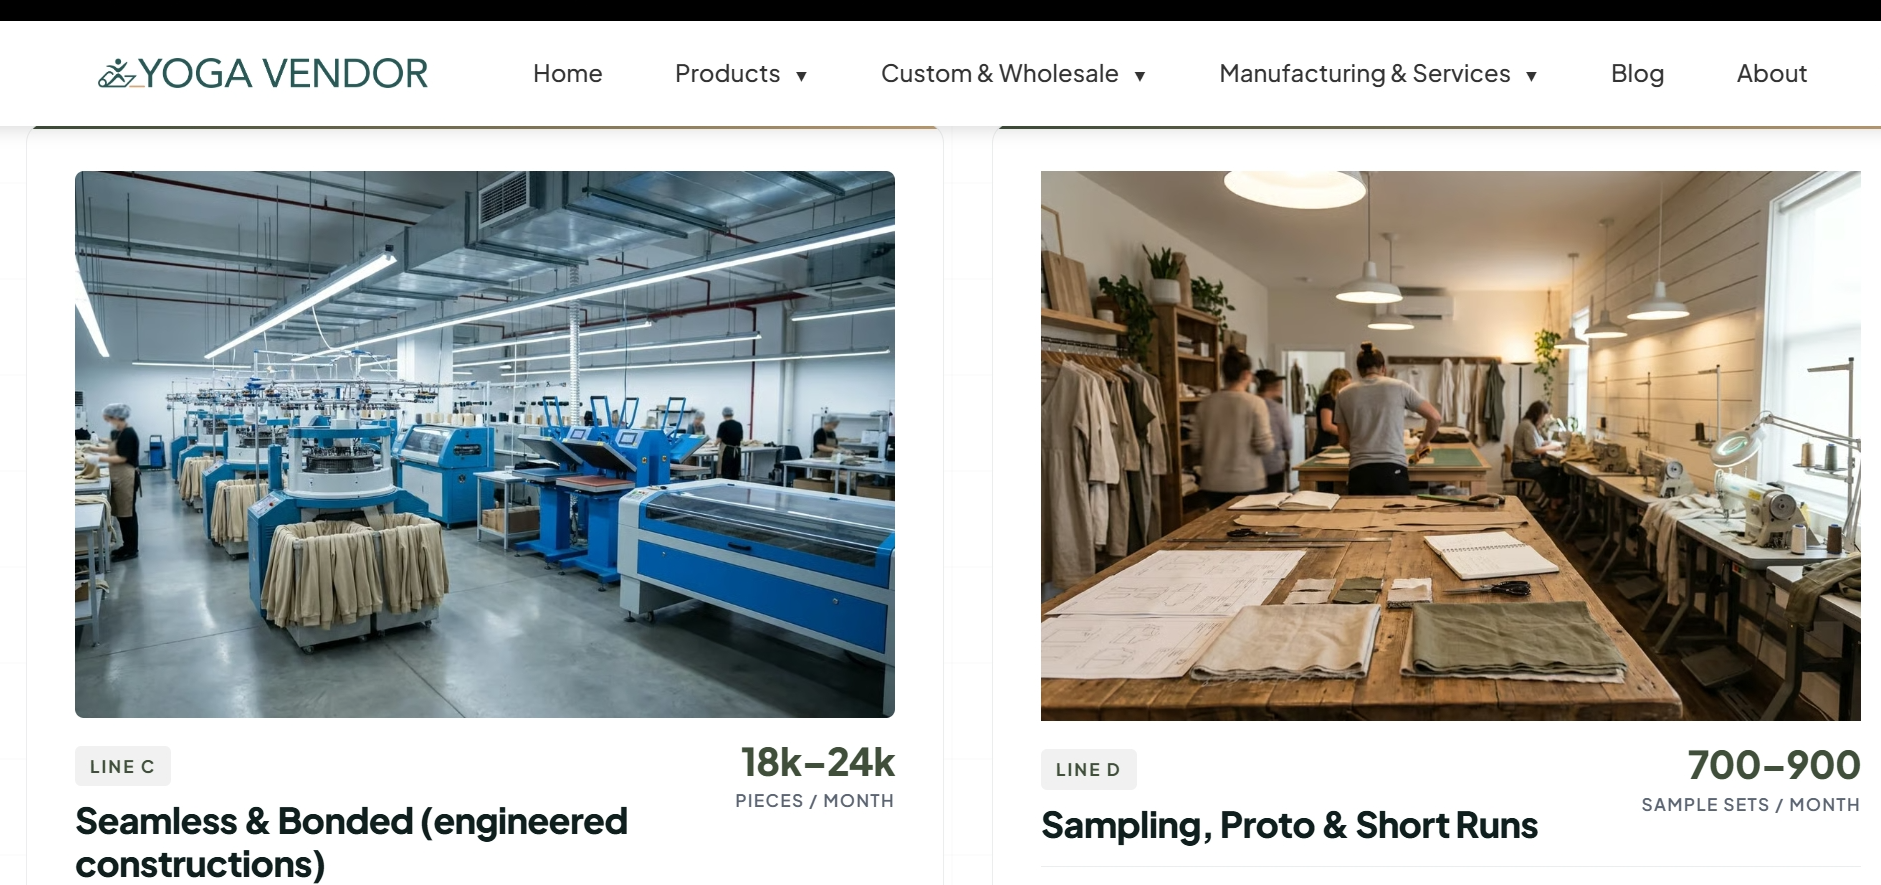
Technique 1 — Product Design & Tech Pack Development: The Blueprint That Controls Production Cost
Every production mistake has a paper trail. It almost always leads back to an incomplete tech pack.
A tech pack is the one document that tells a yoga wear factory how to build your garment. Not roughly. Not open to interpretation. Precisely. Think of it as a contract written in measurements, materials, and stitch counts. One style gets one tech pack — and it must include three core components: flat sketches, a Bill of Materials (BOM), and a full measurement/spec sheet. Leave any of these out, and you're not giving the factory instructions. You're giving them guesswork.
What Lives Inside a Tech Pack (And Why Each Part Earns Its Place)
POM table — every key measurement across all sizes, with grading rules and tolerance ranges included
Construction details — seam type, stitch count, build sequence, and seam allowances
BOM — every fabric, trim, thread, label, and packaging component with quantities listed
Pantone color references — not "dusty rose." A Pantone code. For every colorway.
Artwork placement — print or embroidery files with dimensions and position callouts
Version control — date and revision number on every page
Why Yoga Wear Tech Packs Demand More Detail
Standard knitwear specs don't hold up in activewear production. yoga leggings need extra callouts that most generic templates leave out:
Stretch direction and grainline arrows — these tell the factory how to cut four-way stretch panels in the right elasticity direction. Miss this, and the panels distort.
Flatlock seam placement — marks where low-bulk seams must go to cut down on chafing and keep stretch performance intact
Compression and elastic zones — shows where higher-recovery elastics are needed. A waistband and a calf panel need different tension levels. Your spec sheet should reflect that.
A factory can read your tech pack and still produce something different from what you intended. That means the pack wasn't clear enough. The gap between your vision and their output? That's your sample revision cost.
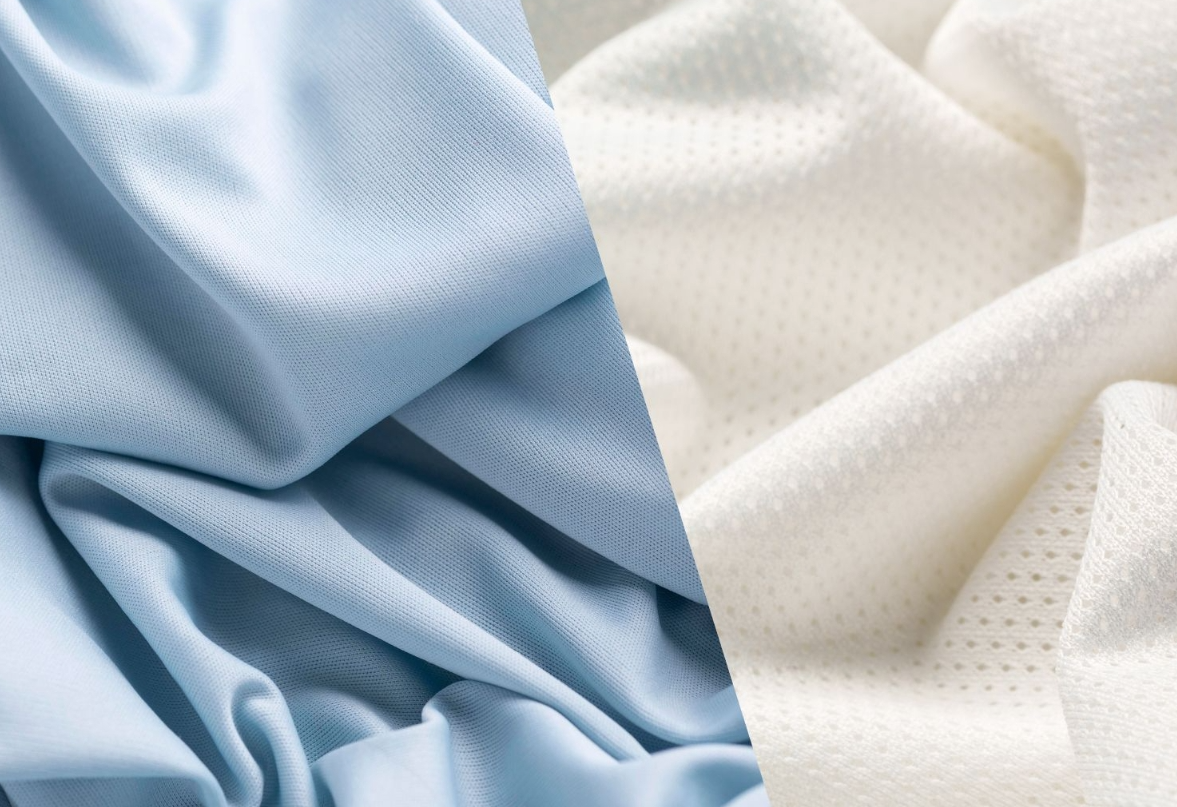
Technique 2 — Fabric Sourcing & Inspection: How Material Choices Define Final Product Quality
Fabric is where your product budget either works hard or vanishes.
Your fabric choice makes decisions before a single seam is sewn. It locks in your price point, performance level, return rate, and brand reputation. Most sourcing talks go straight to price per meter. The smarter starting point is composition.
The Three Fabric Blends That Dominate Yoga Wear Production
Polyester/Spandex (75–88% PET + 12–25% elastane) is the industry workhorse. It's dry, durable, and cost-efficient — priced at $2.50–$3.50/meter at 220–230 GSM. The trade-off: lower-grade yarns feel plasticky against skin. This gets worse without proper finishing treatments.
Nylon/Spandex (65–80% nylon + 20–35% elastane) is what "naked feel" leggings are made of. The surface is smoother. The recovery is tighter. At the same GSM, nylon is noticeably less see-through than polyester. That means nylon hits near-complete squat-proof performance at ~220 GSM. Polyester often needs 230–240 GSM to reach the same level. You pay for that gap — nylon runs 15–30% more expensive , around $3.20–$4.50/meter .
Recycled Polyester/Spandex (75–85% rPET + 15–25% elastane) comes with GRS certification and a sustainability angle. Performance sits close to standard polyester in most cases. But tensile strength can drop 3–8% lower in high-stretch specs. Test this before locking in a production run. The price premium runs 5–15% above conventional polyester .
One number to keep in mind: fabric makes up 40–60% of a finished garment's total production cost. Every material choice you make hits your margin.
What GSM Actually Tells You
GSM — grams per square meter — isn't just a weight spec. It's a transparency signal.
180–200 GSM : Light, breathable, economical. Risky in pale colors under studio lighting.
210–230 GSM : The sweet spot for most yoga leggings. At 20–25% spandex content, most dark colorways pass the squat test with no issues.
240–260 GSM : Maximum opacity. Better for light grays and pastels — but heavier on the body and harder on the budget.
Professional yoga wear factories hold GSM tolerance at ±5% from spec . A single sample point that deviates by more than 8–10% points to inconsistent weaving. That's a reason to renegotiate — or find a new supplier.
How Serious Factories Handle Incoming Fabric Inspection
A factory's incoming inspection process tells you more about their quality standards than any sales pitch.
Colorfastness standards — ask about these directly:
- Perspiration fastness (acid/alkali): ≥ Grade 4 on the grey scale
- Washing fastness: color change ≥ Grade 4 , staining ≥ Grade 3–4
- Dry crocking: ≥ Grade 4 ; wet crocking: ≥ Grade 3 — critical for deep blacks and navy
Four-way stretch and recovery testing needs measurements at 30%, 50%, and 80% elongation across warp, weft, and bias directions. Here's the benchmark that separates good fabric from great: after elongation, residual deformation ≤ 5–8% at 30 minutes. Above 10%? That's the legging that loosens with every wear.
The 4-Point System is the global standard for fabric defect inspection. Serious factories inspect at least 10% of incoming fabric rolls . They score defects by length, with an acceptable cut-off of ≤20 penalty points per 100 square yards . Ask your factory if they archive these scores by roll. They do? They're tracking quality. They don't? That tells you everything.
Buyer's Shortcut : Ask the factory for their incoming fabric inspection report from their last production run — not a blank template, but a completed record with real data. A factory that shares this document runs a system worth trusting.
Technique 3 — Fabric Pre-Treatment & Relaxation: The Invisible Step Most Brands Overlook
Skipping fabric relaxation is like baking bread without letting the dough rest. The results look fine — until they don't.
Knitted fabric arrives at the factory under tension. Rolled tight. Stressed. Cut it that way, and the fabric snaps back after washing. Your customer's leggings shrink 3–7%. In high-stretch yoga fabric, that gap can hit 10–15% — the difference between a size L and something that fits more like a M.
The Relaxation Window That Separates Good Factories from Great Ones
Top yoga wear factories don't cut right away. They wait — on purpose.
Standard knits : flat-rest for 12–24 hours after arrival
Spandex-heavy or high-stretch fabrics : minimum 24–48 hours , tension-free
Environment : kept at 20–25°C , 55–65% RH — extreme humidity also throws off dimensional stability
A shortcut version exists: 8–12 hours for rush orders. But factories using this shortcut should widen your size tolerances by ±1–1.5 size grades. If yours isn't doing that — ask why.
The benchmark for "ready to cut" is simple. Take a 50×50 cm sample before and after relaxation. The dimensions shift by more than 1% ? The fabric isn't ready.
What Skipping This Step Costs You
Unrelaxed fabric arrives with the width stretched 2–8% wider than its true dimensions. GSM reads 2–10% lower than reality. Cut against those false numbers, and every panel is wrong before a single stitch is sewn.
The cascade:
- Post-wash length and circumference shrinkage of 3–7% (standard), up to 15% in heavy-finish fabrics
- Side seams that twist 3–5 cm toward the front after washing — visible and unfixable
- Stripe or pattern skew exceeding 4–8% — a horizontal stripe shifts 2–4 cm across 50 cm of fabric height
High-end activewear factories hold post-cut dimensional tolerance at ±0.5–0.7% . Hitting that number takes 24–48 hours of relaxation, vacuum flattening, and a strict layer cap of ≤60 layers per cut lay . No shortcut keeps that level of precision intact.
Buyer's Question Worth Asking : "What's your minimum relaxation time for spandex blends before cutting?" A factory that gives you a specific number — plus a written SOP — runs a controlled process. Vague answers mean the step gets skipped or applied at random on rush orders.
Technique 4 — Marker Making, Cutting & Bundling: Fabric Waste & Fit Precision Are Decided
Fabric waste doesn't happen at the cutting table. It's decided before the blade touches the cloth.
Marker making is the planning stage where every pattern piece gets placed onto a digital or paper layout. The goal is to pack pieces as tight as possible within the usable fabric width — selvages excluded, with 2 inches trimmed from each end . Largest pieces go down first. Smaller pieces fill the gaps. Nothing overlaps. Every centimeter of usable yield gets squeezed out of every roll.
Most brands barely think about this step. That's a mistake.
CAD vs. Manual: The Gap Is Bigger Than You Think
CAD marker-making software nests pattern pieces to close gaps that a human eye simply misses. A multi-size marker — 4 or 6 sizes nested together — almost always packs tighter than running each size as its own separate marker. That difference shows up in your fabric cost per unit. It's real money.
Manual marker-making still exists in smaller shops. It works. But the yield depends on the operator, so results shift at scale.
Here's a practical checkpoint: ask your factory whether their actual cut yield feeds back into their costing system. No comparison between marker efficiency and the original cost estimate? You're likely covering their waste through your unit price — and you won't see it on any invoice.
Grainline and Stretch Direction — The Detail That Changes Fit
For yoga leggings, grainline isn't a technicality. It's a fit decision.
Every panel in a stretch fabric must line up with the intended stretch direction . Waistband panels, thigh panels, and knee panels each carry different tension requirements. They perform right only when the fabric's elasticity runs the correct way. Misaligned grainlines don't blow out on the spot. The problems show up later — waistbands that lose recovery, thigh fits that shift after the first wash.
CNC cutting tables handle grainline precision far better than manual straight-knife cutting on large-volume runs. You get multiple layers cut at once, precise registration, and repeatable output every time. Manual cutting suits prototypes, small batches, or simple constructions. It's not the right tool for a high-stretch, multi-panel yoga legging.
Bundling: The Last Checkpoint Before Sewing
After cutting, pieces get notched, drill-hole marked, and bundled. This is where multi-SKU, multi-color orders either stay controlled — or start falling apart without anyone noticing.
Two bundling methods are used depending on run size:
- By unit — one complete set of cut pieces per bundle
- By size — all pieces of the same size grouped together; for large runs, sizes may be combined, but never mixed
A bundle with pieces from two different sizes produces a garment that fits no one. That's not a floor accident. It's a systems failure — and a strict bundling protocol prevents it.
Three Questions Worth Asking Before You Place an Order
Does the factory use CAD marker making , and can they show you marker efficiency against your actual yield?
Can they cut multiple layers with CNC equipment for consistent, repeatable results on large runs?
How do they control size and color separation during bundling for multi-SKU orders?
The answers tell you whether the factory manages fabric waste by design — or by chance.
Technique 5 — Sewing & Seam Technologies: The Core Craft That Determines Comfort and Durability
Seams are the silent architecture of activewear. Nobody notices them when they're done right — and nobody can stop noticing them when they're done wrong.
Four seam types cover most of yoga wear construction. Each one behaves in a different way under tension, against skin, and over time. Knowing which is which turns a vague factory conversation into a sharp quality conversation.
The Four Seam Types That Run Every Yoga Legging
Overlock (3/4-thread) locks fabric edges and joins panels at the same time. It's the workhorse of inner structural seams — side seams, inseams, waistband linings. Standard stitch density runs 3–4 stitches/cm. Push it to 4–5 stitches/cm and seam strength improves by a clear margin, though thread consumption climbs 20–30%. The limitation: the seam ridge sits 1.0–1.6 mm above the fabric surface. Against bare skin during long wear sessions, that ridge makes itself known.
Coverstitch shows two or three parallel lines on the outside. The looped underside moves with the fabric. It's the standard for hems, cuffs, and waistband edges — anywhere the seam needs to stretch without popping. Three-needle coverstitch gives 15–25% more seam strength than two-needle. It also has a cleaner, more technical look. The underside creates a faint ridge. That matters less at hems than it would against an inner thigh.
Flatlock is what separates a professional yoga legging from a basic one. Fabric edges meet and flatten out — the seam sits flush with the surface on both sides. You find it where skin contact and friction are highest: inseams, gussets, underarms, side body panels. Flatlock uses 1.8–2.5× more thread than overlock per meter. The payoff is real. Flatlock cuts skin friction points by 30–50% compared to standard overlock. In blind consumer tests, flatlock leggings score 15–30% higher on "comfort against skin" ratings. Brands know this. Flatlock has become a visual signal for "premium." Contrast-color flatlock lines tell the customer this is quality gear — before they read a single word of product copy.
Bartack reinforcement isn't decorative. It's a dense zigzag stitch placed at stress points — drawstring exits, pocket corners, side slits. At those spots, bartacking redirects where the fabric fails under tension. It improves local tear resistance by 30–60% over simple lockstitch finishing.
What Flatlock Costs — and What It Returns
Full flatlock on critical seams — inseam, gusset, side seams — covers about six long seam runs per pair. That adds 30–50 seconds of production time per unit. At a combined labor and overhead rate of $4–6/hour, you're looking at $0.32–$0.90 per pair in direct labor cost . Add thread consumption and equipment costs, and the total manufacturing premium lands at $0.40–$1.00 per unit — about 5–12% above an all-overlock build.
Brands price that gap at 1.5–3× on the FOB side. That creates $0.60–$3.00 of extra margin per unit and supports a 10–30% retail price premium for "Pro" or elevated product lines.
The returns are clear. Post-purchase complaints about inseam and gusset chafing drop 30–50% after switching those seams to flatlock. The drop is sharpest among high-intensity or long-duration users.
One Buyer Question That Reveals a Factory's Real Standard
Before committing to a factory, ask this: "Which seams do you use flatlock on by default, and which require upcharge?"
A factory that answers with specific seam locations — not "we can do it if you want" — holds a clear product standard. That's the factory building leggings that stay off the returns shelf.
Technique 6 — Printing, Logo & Embellishment: Matching Right Method to Your Design & Fabric
The printing method you pick doesn't just change how your leggings look. It decides whether the design survives fifty washes — or starts cracking after ten.
Three methods dominate yoga wear production. Each one serves a different purpose, fits a different fabric, and suits a different order size.
Sublimation: The One Method Built for High-Stretch, All-Over Design
Sublimation printing is the top choice for polyester-based yoga wear. The dye goes straight into the fiber — not layered on top. No surface film. No added stiffness. The printed fabric stretches 100–150% without cracking, and it feels nearly the same as unprinted fabric in your hands.
Color performance is just as strong. On white or light-colored polyester (≥65–80% polyester content), sublimation produces photo-quality gradients and patterns with colorfastness ratings of 4–5 — the highest range in activewear production. After 30 home washes at 40°C, color shift stays below ΔE 2. At that level, the human eye sees no difference.
The trade-off is scale. Sublimation carries real startup costs — setup, color calibration, machine time — that can eat 30–50% of a small-batch order's print budget. Most factories set minimum order quantities at 50–100 pieces per colorway. Some digital print factories go as low as 20–30 pieces, but expect to pay a 20–40% unit price premium.
The cost curve matters. Sublimation cost per unit drops 50–60% as you scale from 50 to 1,000 pieces. Volume is where it pays off.
Who it's for: Established brands running signature prints or gradient colorways at 200+ pieces per color. Not the right tool for a studio owner ordering 40 custom yoga leggings.
Heat Transfer: The Small-Batch Solution for Logos and Personalization
Heat transfer — including DTF, PU film, and vinyl — gives you flexibility that sublimation can't match at low volumes. You can apply a 5×5 cm chest logo to a single piece. The same transfer file works across multiple silhouettes and sizes. No retooling needed.
The cost reflects that flexibility:
50 units: a small heat-transferred logo runs $0.25–$0.40 per application
1,000 units: that drops to $0.08–$0.12 per application
At every volume level, the total cost stays well below full-body sublimation
The limitations are real, though. Standard PU transfer film has a stretch ceiling of 120–150%. On high-stretch yoga fabric, large-area transfers can develop micro-cracks or an "orange peel" texture during deep stretches or squats. High-stretch transfer materials push that ceiling to 200–250%, but add 30–50% to material cost.
Keep heat transfer to small applications — logos, brand marks, personalization. Do that, and the performance gap shrinks to almost nothing.
Who it's for: Studio brands and early-stage labels running under 100 units per style. Also a solid option for large brands adding limited-edition logos without opening a separate sublimation run.
Screen Printing: Strong on Solids, Limited on Stretch
Screen printing delivers bold, opaque color blocks on cotton and cotton-blend garments. For yoga studios ordering branded T-shirts or cotton fleece pieces, it gives consistent results at competitive costs for runs of 100+ pieces.
On high-stretch yoga fabric, the problems start fast:
Standard plastisol inks crack at 50–80% elongation
Elastic stretch inks extend that range to 100–120%, but add 15–30% to ink cost and need tighter operator control
Full-body or multi-panel yoga leggings are not a good fit for screen printing
The practical rule: Use screen printing for studio merchandise and cotton-blend pieces. Move to sublimation or heat transfer the moment a design goes onto a spandex-blend performance legging.
The Decision in One Line
Match your print method to three things: fabric composition, design complexity, and order volume — get those right, and the best choice becomes clear.
Technique 7 — Washing, Finishing & Pressing: The Final Treatment That Stabilizes Performance
A garment can fit perfectly in the factory, then shrink a full size before it reaches your customer's dryer. Washing, finishing, and pressing are not cosmetic steps. They lock in dimensional stability and hand feel for the life of the product.
Pre-Shrinking: Controlling the Numbers Before Your Customer Does
Untreated knit fabric shrinks 6–10% after the first home wash. One round of mechanical pre-shrinking brings that number down to 1–3% . The process uses steam moisture at 15–25% regain , compressed through a rubber blanket at 5–15% line speed differential , and runs at 120–160°C . That's the control standard most international brands write into their yoga wear supplier agreements.
Hold your factory to this benchmark: after 3–5 home washes , finished garment dimensions should shift ≤3% in any direction. For tailored or premium pieces, tighten that to ≤2% .
Finishing: The Cost-Per-Unit Math Behind "Soft" and "Durable"
Small per-unit investments in finishing produce large gains in how consumers perceive your product.
Softening is the clearest example:
Mechanical-only softening costs $0.01–$0.03/unit . Results are limited.
Chemical softening with 1–3% owf silicone or cationic agents pushes hand-feel scores from 2–3 out of 5 up to 4–5 out of 5 on standard fabric evaluation scales. Cost: $0.05–0.25/unit .
High-end silicone finishing supports a 5–10% factory price premium . Customers can feel the difference the moment they touch the fabric.
Anti-pilling treatment uses resin cross-linking at 3–8% owf . It lifts Martindale pilling grades from 2–3 up to 4–5 , holding ≥3–4 grades after 5 washes . Per-unit cost runs $0.05–0.15 . Brands that skip this treatment see it come back as returns.
Functional Finishes: Where Differentiation Gets Measurable
Three add-on treatments carry real retail price premiums — and the numbers back it up:
Antimicrobial finishing : Basic treatment runs $0.10–0.30/unit . High-durability systems — those holding ≥90% bacteria inhibition through 30–50 wash cycles — cost $0.80–1.50/kg of fabric . The market premium they support ranges from 10–50% , depending on category.
Cool-feel treatment : Raises the contact cooling coefficient (q-max) from 0.10–0.15 W/cm² on standard fabric to 0.18–0.25 W/cm² — a 40–80% improvement . Cost: $0.30–0.80/kg . In summer activewear, that shift can mean 15–40% retail price upside .
Brushing and peaching : Adds warmth (clo value up 10–30% ) at $0.20–0.50/kg for mechanical processing alone. Always pair it with anti-pilling treatment. Brushing alone drops pilling resistance by one full grade.
Buyer's Note : Ask your factory for post-finish QC wash records — dimensional measurements at wash 1, wash 3, and wash 5 against the original spec. Factories running that data are managing performance by evidence. Factories without it are managing by hope.
Technique 8 — Final Quality Control, Packing & Shipping: Last Line of Defense
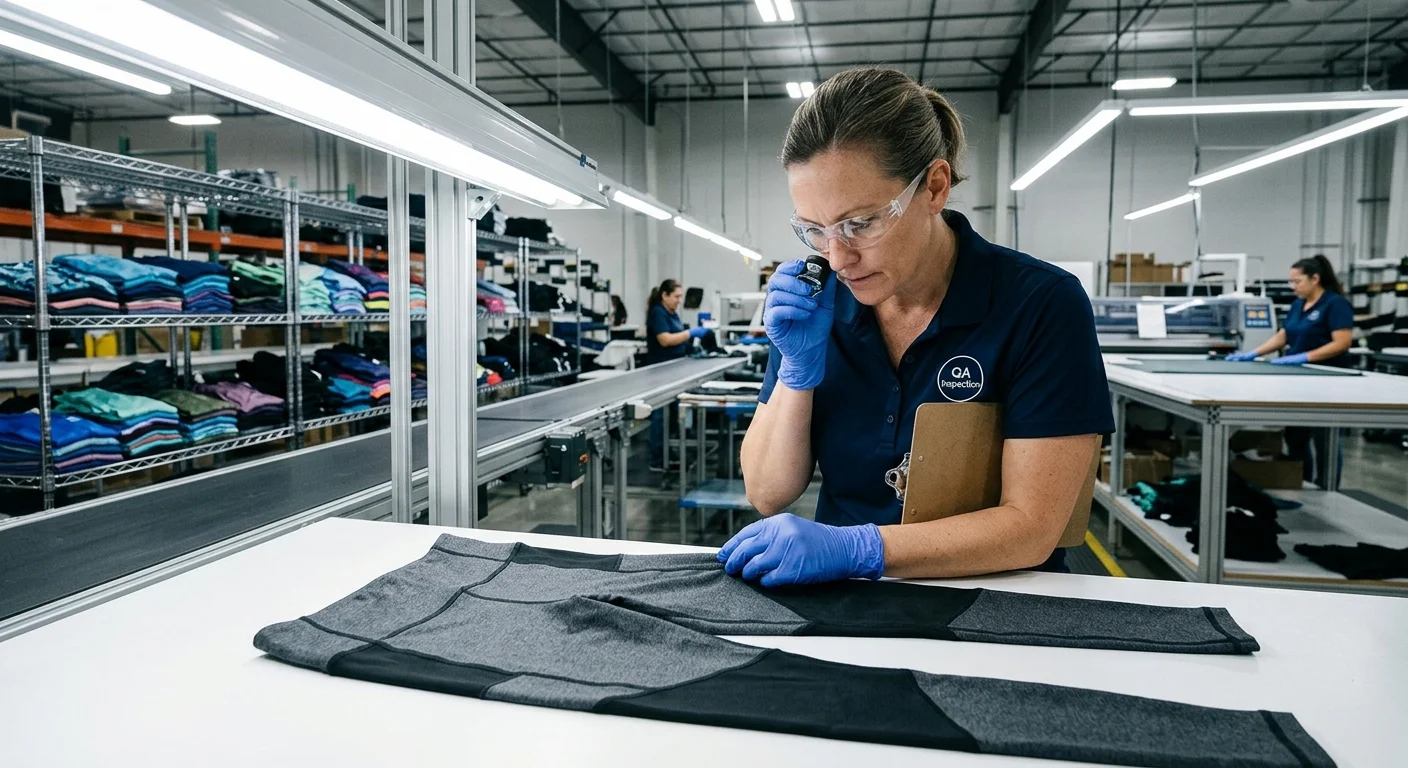
Every defect that slips past the factory floor becomes a customer service problem. Customer service problems cost you money — in refunds, in reputation, and in trust that's almost impossible to win back.
QC isn't a single moment at the end of production. In a serious factory, it's a system with three distinct checkpoints. Each one does a job the others can't.
Three QC Checkpoints That Separate Serious Factories from Risky Ones
In-line inspection (IPQC) runs throughout sewing — not just at the end. Every 1–2 hours, inspectors pull 3–5 pieces per line. They check:
- Stitch density (10–12 stitches per 3 cm)
- Seam strength at stress points (10–15 kgf manual pull on side seams and crotch)
- Thread tail length (≤3 mm exposed)
The target: keep single-process defect rates below 2%. Any process that hits 3–5% defects triggers a line stop for correction.
Mid-production inspection runs after sewing is complete, but before washing and pressing. Sampling follows ISO 2859-1 General Inspection Level II at AQL 2.5–4.0 — stricter for premium orders. Inspectors check:
- Color variance (ΔE ≤ 1–1.5 against the approved standard)
- Measurements across every size (key dimensions within ±0.5–1.0 cm)
- Functional elements like zipper pull cycles and button pull strength (≥90N)
Critical defects — tears, severe staining — have a target of zero.
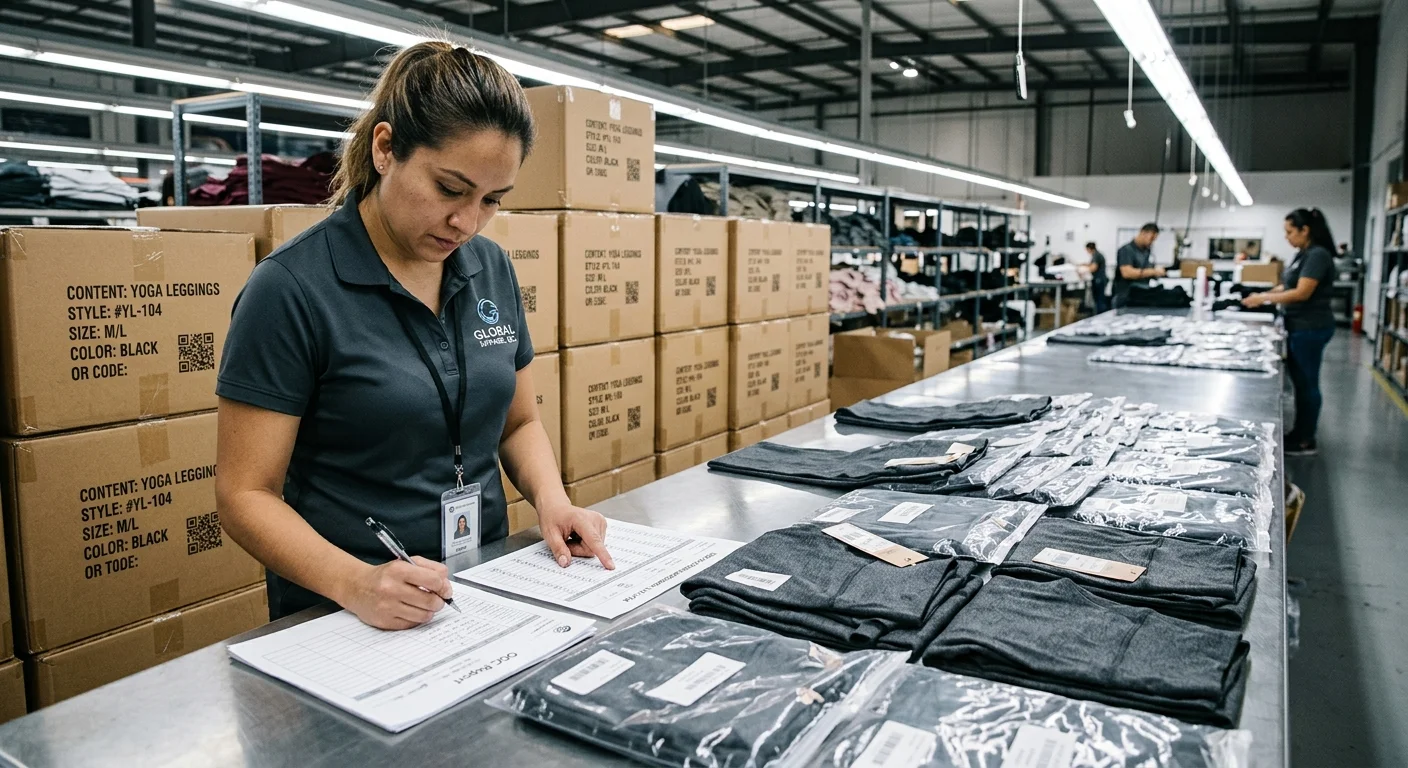
Final QC and outgoing inspection (FQC + OQC) is the last gate before packing. FQC covers a full visual review plus functional testing: print adhesion, wash label friction resistance, and snap or zipper performance. OQC then cross-checks the physical shipment against the packing list — verifying SKU, size ratios, quantities, and carton labels before the box closes.
Factories that skip the first two checkpoints and lean on FQC alone tend to find problems at the worst possible time. Third-party inspection data shows a clear pattern. Factories running IPQC plus mid-production checks hold final defect rates at 1–2% . Factories running final inspection only? Defect rates land at 5–10% . Sizing errors go undetected until the full run is done. That triggers full-batch rework at 2–4× the labor cost of catching the same problem inline.
Two Performance Tests Worth Running Before You Accept a Shipment
The squat test is not optional for yoga leggings. Under 500–800 lux white light — close to retail store conditions — a fit model performs 3–5 deep squats with thighs parallel to the floor. Opacity is graded on a 1–5 scale. Most mid-to-high-end brands require ≥ Grade 3. Premium legging categories demand ≥ Grade 4. Fabric that doesn't return to shape within 60 seconds of the squat is a functional fail — not just an aesthetic issue.
Elastic recovery testing gives you a hard number. Cut a 50 mm × 200 mm strip in the maximum stretch direction. Mark a 100 mm test segment. Stretch to 130–150% of original length, hold for 30 seconds, release, and measure after one minute. High-performance activewear fabric should recover at ≥90–93% . Permanent elongation under 5% is excellent. Over 10%, and the fabric will bag out with wear. Return that batch.
Packing Details That Affect Retail and Logistics More Than You'd Expect
Tagging, folding, and boxing affect your store presentation and your freight cost — more than most buyers expect.
Hang tags should sit at consistent positions: waistband loop for bottoms, left collar for tops. Cord length should be standardized at 6–10 cm for easy scanning and rack display. Tags placed across the main print zone block your logo and hurt shelf appeal.
Folded dimensions matter at scale. A tighter, standardized fold — matched to your retail display fixture or e-commerce polybag spec — fits 10–20% more units per carton . That cuts sea or air freight unit cost by 5–10% on volume-rated shipments. Loose or inconsistent folding does the opposite. It increases in-transit creasing and pushes return rates up by 1–3 percentage points.
Buyer's Checkpoint : Ask the factory for the OQC report alongside the packing list before approving shipment. Verify that size ratios, color breakdowns, and carton quantities match your purchase order. A factory that produces this documentation without being asked runs a system built for accountability — not just output.
How to Evaluate a Yoga Wear Manufacturer Based on These 8 Techniques
The gap between a factory that can say the right things and one that can do them shows up in three places: equipment, process capability, and quality systems. Not in their sales deck. Not in their showroom samples. On the actual production floor — and the documentation that proves it runs the way they claim.
Below is a practical evaluation framework built around the same 8 techniques this guide covers. Use it as your audit checklist before signing anything.
Equipment, Process Standards & QC Benchmarks by Stage
Fabric Preparation
A serious factory runs incoming fabric inspection at ≥10% of each roll batch. Inspection machines need lighting at ≥800 lux. Ask to see completed records — not blank templates. Those records should include GSM measurements, color lot numbers, stretch data, and shrinkage results.
For yoga knits, check these shrinkage limits:
- Warp: 3–7%
- Weft: 2–5%
- High-stretch nylon/spandex blends: within 5%
Cutting
CAD marker-making is the standard. Ask for their fabric utilization rate. Also check whether actual cut yield feeds back into costing — it should.
For yoga leggings, finished waist and hip measurements should land within ±1–1.5 cm. Premium factories hold ±0.5–1 cm. For high-stretch knits, cut layers should stay at 20–40 per lay. Compression management records should be documented per lay.
Sewing & Seam Construction
Four core machines matter here:
- Flatlock (four-needle six-thread)
- Overlock
- Coverstitch
- Lockstitch
Flatlock stitch density should run 2.5–3.5 stitches/cm. Too tight and the seam turns brittle. Too loose and it splits under load.
Pull seams at high-stress points — crotch and side seams — to 120–130% of original length. No thread breakage is the pass threshold. Mid-range factories target ≥10–15 kgf pull strength at stress seams. Higher-end operations push that to >18 kgf.
Edge Finishing
Check waistband elastic join thickness. Overlapped joins should not exceed four fabric layers. Lay multiple pieces flat and compare hem and cuff lines. Wave deviation should stay ≤5 mm across pieces. Skip-stitch rate should fall below 1 per thousand stitches.
Bonding & Tape Application
For premium styles, bonded seam peel strength after 5 washes should reach ≥2.5 N/cm at minimum. High-end standards require >3.5 N/cm. Tape position deviation should stay within ±1–2 mm, with no corner lifting.
Ask to see the bonding parameter sheet. Temperature, pressure, dwell time, and cooling time should all be logged per run. No log means no process control.
Print & Embellishment
Here are the minimum passing grades to look for:
- Washfastness: ≥ Grade 4
- Dry crocking: ≥ Grade 4
- Wet crocking: ≥ Grade 3–4
- Perspiration fastness: ≥ Grade 4
Printed logos on stretch fabric should show no visible cracking after 20–30 wash cycles. Color variance within a single purchase order should hold at ΔE ≤ 1–1.5.
Finishing & Pressing
Steam pressing temperature for high-stretch fabrics should stay within 110–140°C. Go above that range and polyester-spandex surfaces start to develop sheen or melt distortion.
After steaming, the garment's natural recovery should exceed 90% before you take measurements. Factories that use shaped pressing forms for legs and torsos produce better dimensional consistency than those pressing flat. It's a small detail that shows up clearly in finished product quality.
Final QC & Packing
Ask what AQL level they run at final inspection. Mid-range performance brands specify AQL 2.5 (Major) / 4.0 (Minor). Premium brands tighten to 1.5/2.5.
Target rates to look for:
- Size mislabeling: below 0.3%
- Wrong-packing: below 0.5%
The standard worth holding to: an independent final QC team, separate from the production line, running 100% visual inspection plus dimensional checks on 5–10 pieces per size per color.
FOB Price Benchmarks: Identifying a Reasonable Quote
Basic construction (single-color, standard nylon/spandex or polyester/spandex, overlock + flatlock, no bonding, no functional finishes):
Reasonable FOB runs $4.00–$8.00/piece at 300–500 MOQ.
A quote under $3.50 that claims 230–260 GSM nylon/spandex with full flatlock construction and AQL 2.5 compliance is a red flag. Something is being swapped out — fabric weight, thread quality, or pre-shrinkage treatment. One of those three is almost always the cut.
Mid-range technical construction (multi-panel, mesh inserts, jacquard structure, partial functional finishing):
Single bottoms: FOB $7.00–$12.00/piece
Coordinated sets: $14–$20
Knowing these benchmarks does more than protect your budget. You get the ability to ask sharper questions — and to spot when a low quote reflects real capability limits, not just a competitive price.
Conclusion
Every stitch, every seam, every fiber tells a story — and now you know how to read it.
Knowing these 8 manufacturing processes makes you a smarter buyer. It makes you harder to fool. A supplier quotes you a low price? You'll know which corner they're cutting — skipping fabric pre-treatment, using cheap flatlock alternatives, or rushing final quality control before shipping.
That's real leverage.
Sourcing yoga wear for the first time? Re-evaluating your current yoga clothing manufacturer? Use these techniques as your checklist. Not just background reading.
Ask factories specific questions
Request process photos
Demand fabric test reports
Skip the guesswork — yogavendor.com connects you with verified manufacturers who treat all 8 of these steps as non-negotiable.
Because the best yoga wear isn't just worn. It's built — with purpose, precision, and nothing left to chance.